Search for a member by following the directions here.
Select the members’ name.
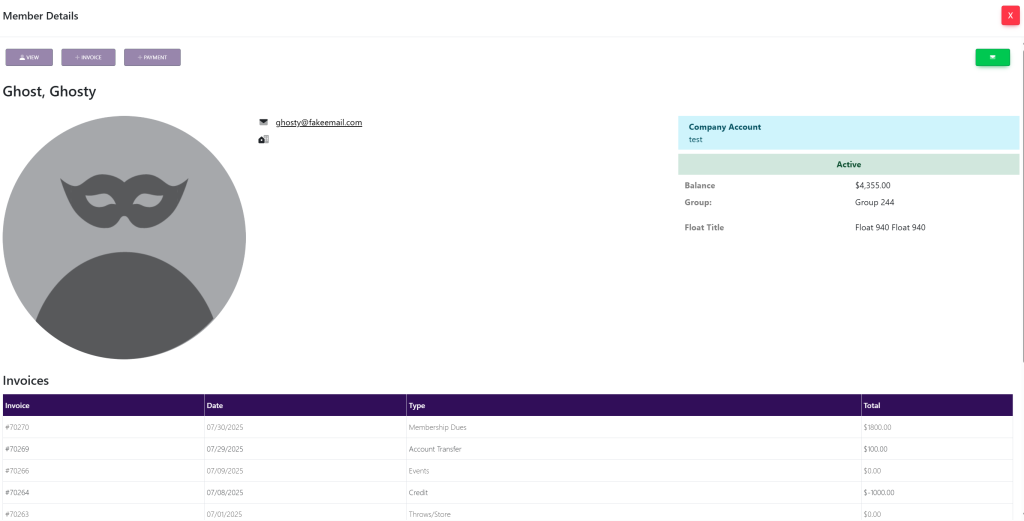
A new pop-up window will appear with the member information. It will look like this:
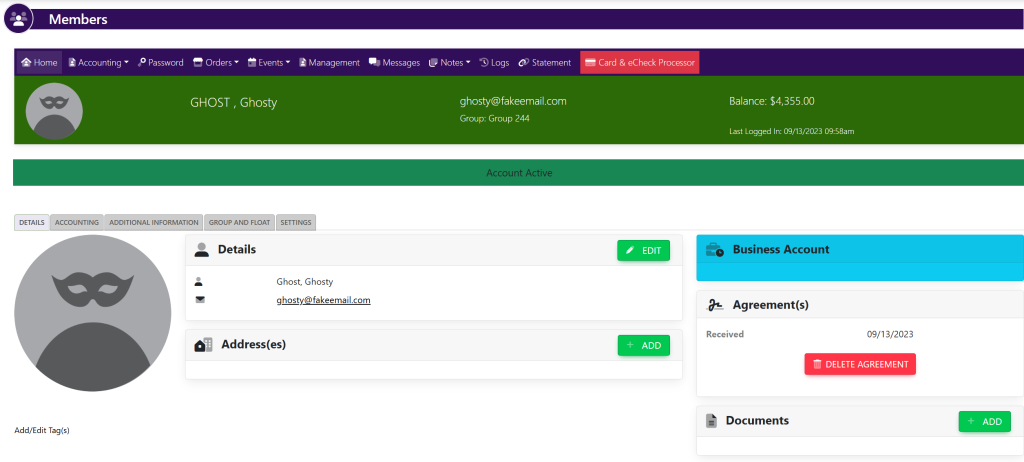
At the top left of the pop up, select the purple button titled View. This will take you here:
In the horizontal navigation bar, select Accounting. Then, select +Invoice. A pop up will appear that looks like this:

Select the type of invoice using the drop-down menu next to Invoice Type. Once selected, your pop up will look like this:
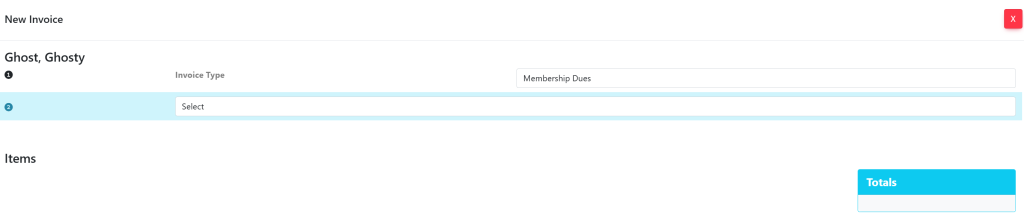
This will prompt a new drop-down menu to appear. To add items to the invoice, select either Charges and Credits or Store Items & Products using this drop-down menu. Once selected, your pop up will now look like this:
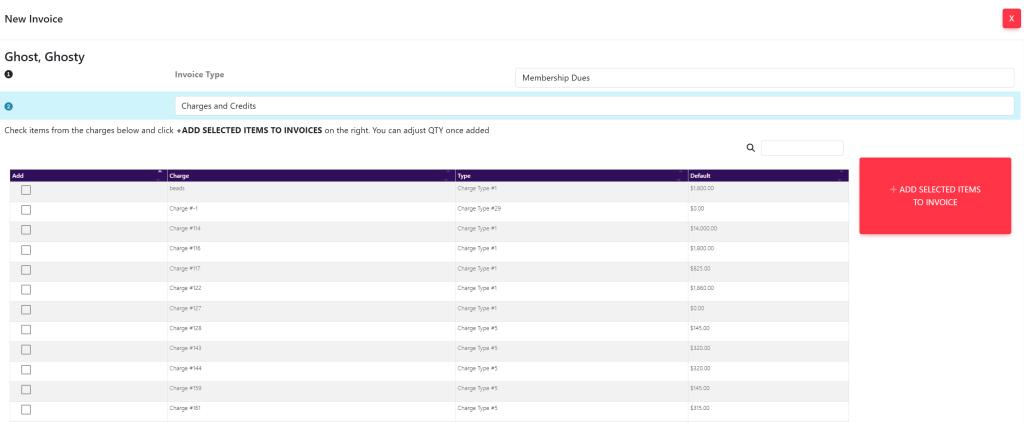
Scroll to find the items you want to add to the invoice, then select the check box to the far left of the screen on the same row as the item.
After selecting your items, select the red button to the top right of the item list titled Add to Invoice. Your pop up will now look like this:
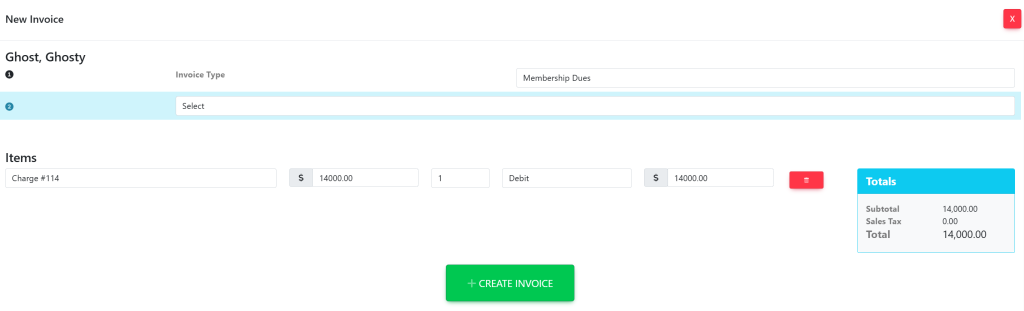
In each item line select the quantity that you would like to add to the invoice.
After all of the items have been added to the invoice, scroll to the bottom of the window to view the invoice total.
Select the green button at the bottom of the window titled +Create Invoice to add the invoice.