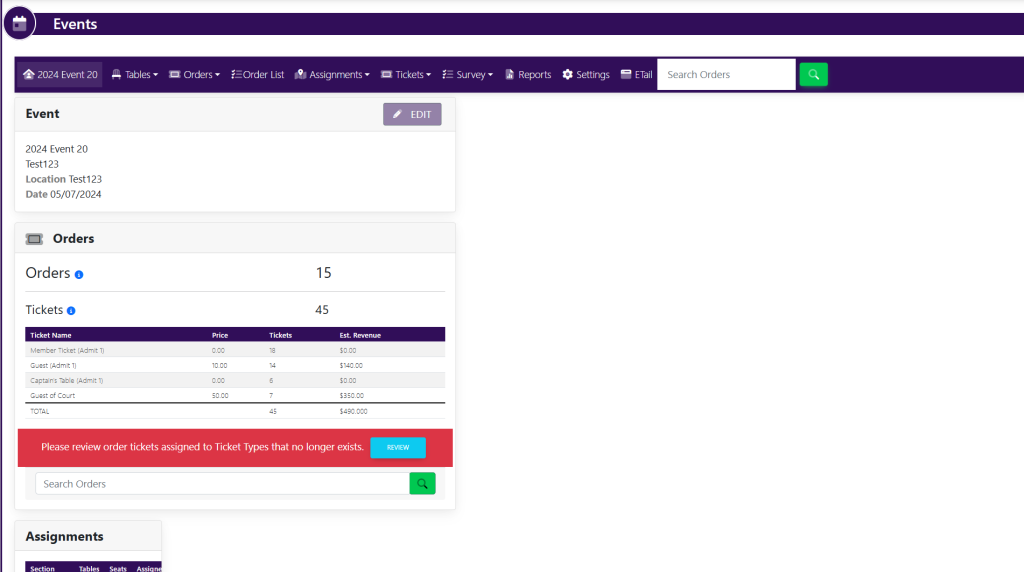
On the left-hand side of the screen in the navigation bar under EVENTS, select Events. This will take you here:

On the Events page, select the desired event. This will take you here:
In the horizontal navigation bar at the top of the screen, click Types from the Tickets drop-down list. This will take you here:

To edit, click on the desired ticket. A pop-up window will appear that looks like this:
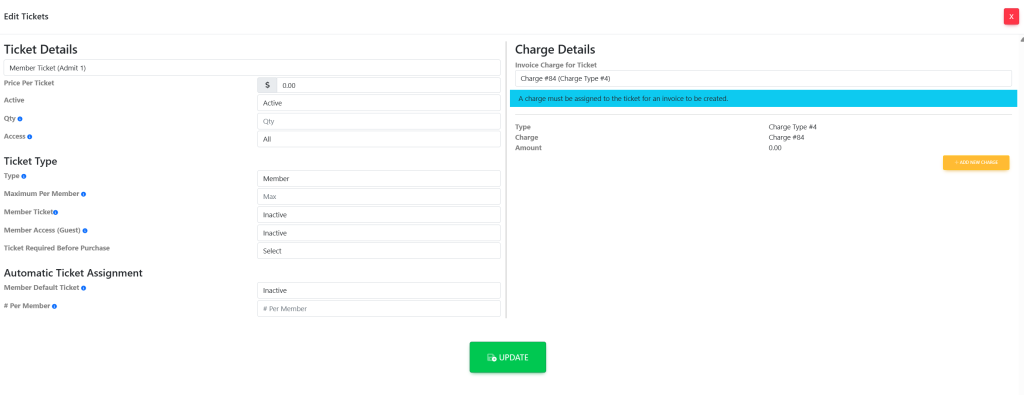
You can edit the following within the Edit Tickets box:
Ticket Details
- Price Per Ticket – This setting is what is shown when a member views the ticket types within the order pop up.
- Active – This setting allows the ticket to be active for the admins. This does not make the ticket active for the members.
- Qty – This will show admins the quantity of this specific ticket.
- Access – There are 3 options: All, Admin-only and Member-only.
- Admin-only – This setting will only show to admins within the system. The members will not have access.
- Member-only – This setting will only show to members within the system. Admins will still have access to edit the ticket but if an admin is not an active member, they will not have the ability to purchase. Also, these tickets will not be visible to guests within the public guest link.
- All – This setting allows admins, members and guests to have access to purchase this ticket.
Ticket Type
- Type – This specifies within your reporting if this is a Member ticket or a Guest ticket. This will also give you the ability to choose if a member or a guest is presented with this ticket to purchase either from the members account or the guest link.
- Maximum Per Member – This setting specific the amount of tickets that can be purchased at one time. Please note that this does not set a limit of how many tickets that a member can purchase entirely. They will still have the option of ordering more tickets in the future.
- Member Ticket – This setting allows you to turn on sales for the ticket for members.
- Member Access (Guest) – This setting allows you to turn on sales for the ticket for guests.
- Ticket Required Before Purchase – This setting allows you to set a specification on if a specific ticket type should be purchased prior to allowing members to purchase other ticket types. If you do not want this specification, do not make a select from the drop down list within this setting.
- For example – If there are Member and VIP tickets, a member ticket must be purchased prior to having the ability to purchase VIP tickets.
Charge Details
Click the yellow + Add New Charge located in the top right-hand corner. Your pop up will now look like this:
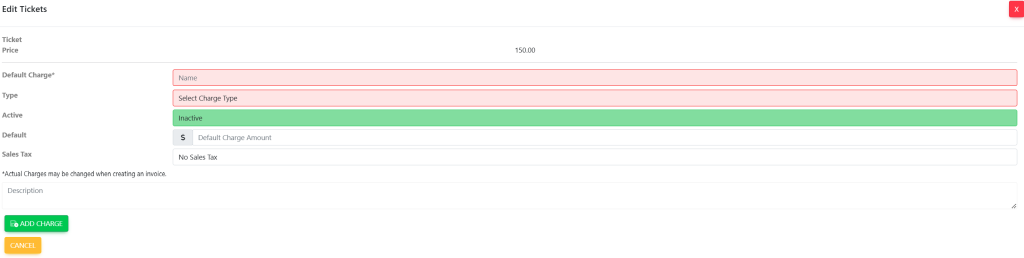
Fill out the following information:
- Default Charge – This is the title of the charge listed within the charges list.
- Type – This will assign the type of charge it will be in the system. For example – Events, Dues, etc.
- Active – This will make the charge Active/Inactive within the system. Please note that if this is selected as inactive, the ticket will not show on invoices.
- Default – This is the amount of the ticket that will be assigned to the system for processing.
- Sales Tax
- Description
Once completed, select the green button titled Add Charge. Your pop up will now look like this:
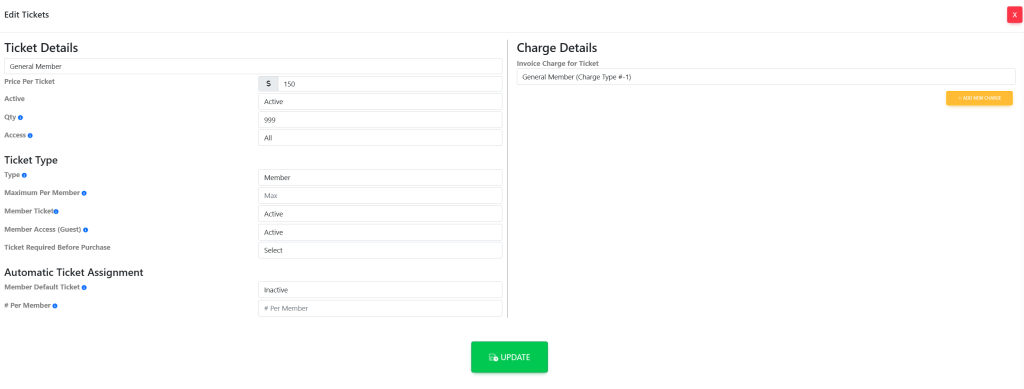
Alternatively
You may add a charge following the directions here and select the charge from the drop down list for the same result.
When finished, select the green button titled Update to save your changes.