On the left-hand side of the screen in the navigation bar, select Events. This will take you here:

On the Events page, select the desired event. This will take you here:

In the horizontal navigation bar at the top of the screen, click Types from the Tickets drop-down list. This will take you here:

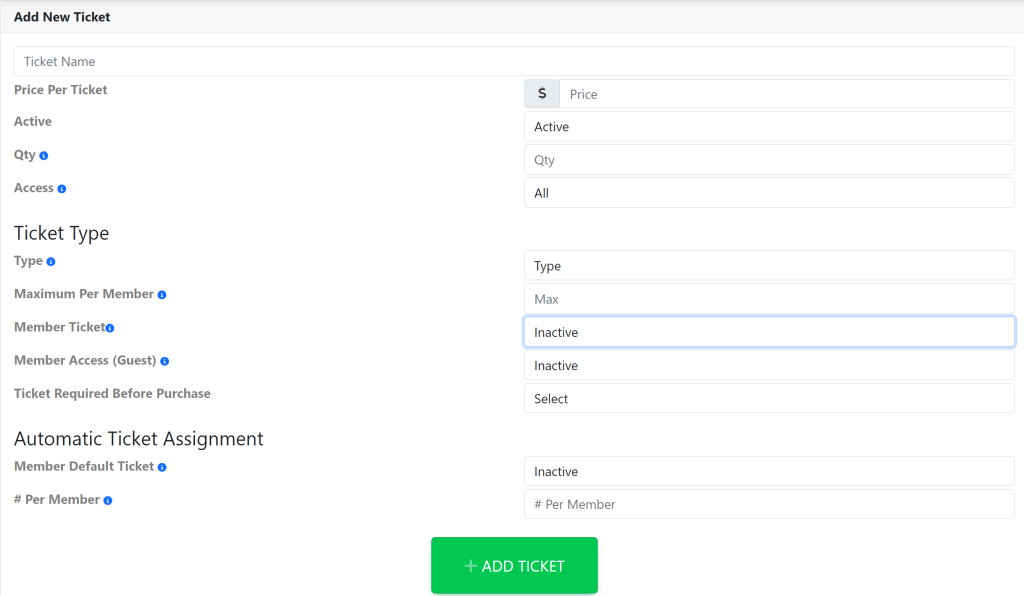
Scroll down to the box labeled Add New Ticket.
- Follow the prompts to add the information for the new ticket type.
- Click on each box and type in the respective information.
- Ticket name (The name of the ticket)
- Price Per Ticket (The price of the ticket)
- Quantity (The total amount of tickets available for the event)
- Access (Guest, Admin Only and Member Only)
- Type (Guest or Member)
- Maximum Per Member (The total amount of tickets permitted to purchase per transaction)
- Member Ticket (Allows admins to assign the tickets by group)
- Member Access (Guest) (Allows members to purchase guest tickets)
- Ticket Required Before Purchase (Does not allow members to purchase the specific ticket unless they purchase the initial ticket first)
- Member Default Ticket (Automatically assigns the ticket to the members account)
- # Per Member (Amount of tickets automatically assigned to the members account)
- Click on each box and type in the respective information.
When done, click the Add Ticket button to save changes.
Once the ticket has been created, you will need to assign a charge to the ticket so that members (or guests) are able make a purchase.
Scroll to the top of the page and you will see the list of tickets shown here:

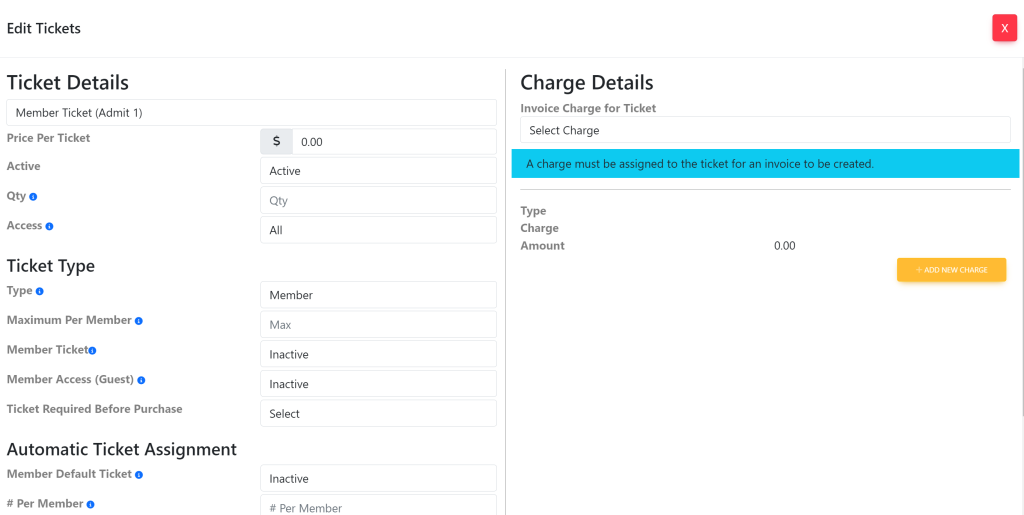
Select the ticket that you have created. A pop up will appear that looks like this:

On the right side of the pop up, you will see a box titled Charge Details.
If you have already created a charge for the ticket, select Select Charge under Invoice Charge For Ticket and select the green update button at the bottom of the pop up.
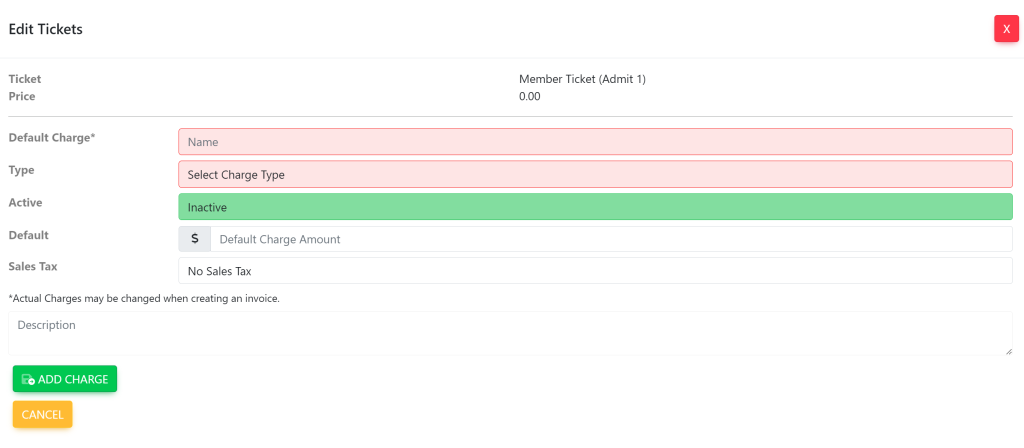
If you have not already created a charge for the ticket, you will create one by selecting the yellow button titled +Add New Charge. A new window within your pop up will appear that looks like this:

You will fill in:
- Default Charge (The price of the ticket)
- Type (The type of charge that you would like for this to show up in reporting. In this case, it would be event)
- Active (This makes the charge active/inactive)
- Default (This is the amount that will be charge on the backend)
- Sales Tax
- Description
Then, select the green button titled Add Charge.
