1. Home
  2. Knowledge Base
  3. Administration
  4. Announcements
  5. ANNOUNCEMENTS: How to add announcements
  1. Home
  2. Knowledge Base
  3. Administration
  4. ANNOUNCEMENTS: How to add announcements

ANNOUNCEMENTS: How to add announcements

Updated for 7.0

On the left-hand side of the screen in the navigation bar under News & Calendar, select Announcements. This will take you here:
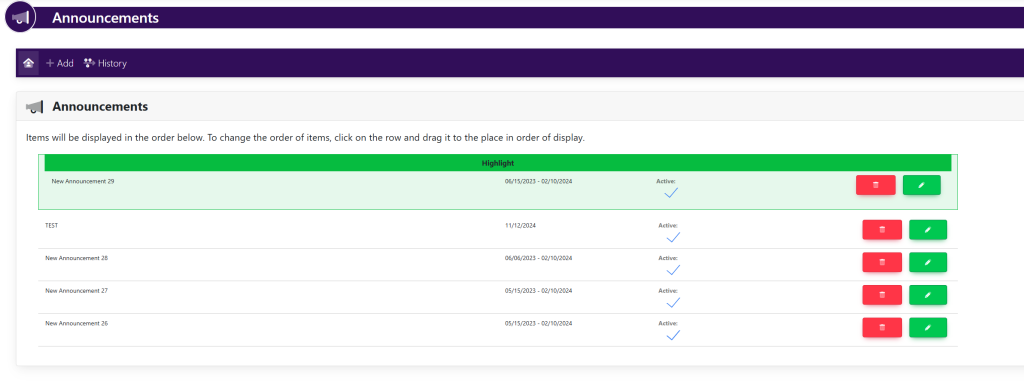
In the menu bar at the top of the screen, select the button titled Add. This will take you here:
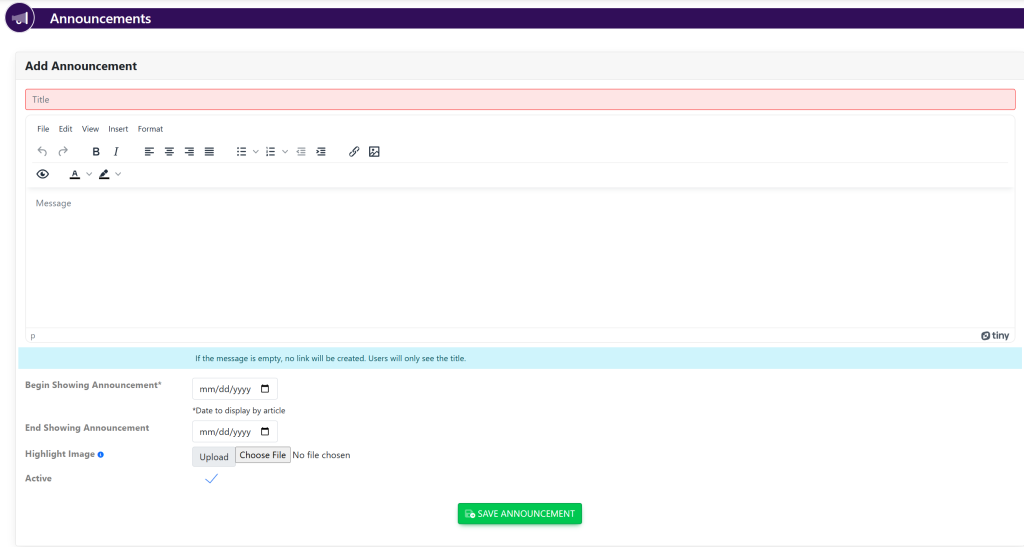
Enter the title of the announcement in the text box at the top of the screen.

Enter the text for your announcement in the large text box directly underneath the title.

Next, click the box next to Begin Showing Announcement and use the calendar pop-up to choose the date you want the announcement to start showing on.

Click the box next to End Showing Announcement and use the calendar pop-up to choose the end date. 

To add an image to the announcement, click Choose File to the right of the Upload button.

To make the announcement inactive, select the toggle next to Active and make sure it is red.

To make the announcement active, select the toggle next to Active until it is green and titled ON.

To save your announcement, click the button to the bottom of the screen titled Save Announcement.

Updated on May 30, 2023

Related Articles